







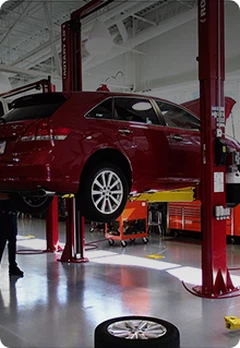

Hey there, fellow vehicle enthusiasts! As a supplier of vehicle storage lifts, I know how important it is to keep your lift in top - notch condition. One of the most crucial maintenance tasks is lubricating your vehicle storage lift. In this blog, I'll walk you through the process step by step, so you can ensure your lift operates smoothly and safely for years to come.
Why Lubrication Matters
First things first, let's talk about why lubrication is such a big deal. When you lubricate your vehicle storage lift, you're reducing friction between moving parts. Friction can cause wear and tear over time, leading to premature failure of components. It can also make your lift noisy and less efficient to operate. By lubricating regularly, you can extend the lifespan of your lift, improve its performance, and save yourself from costly repairs down the road.
Types of Lubricants
There are several types of lubricants available, and choosing the right one for your vehicle storage lift is key. Here are some common options:


- Grease: Grease is a thick, sticky lubricant that's great for areas where you need long - lasting lubrication. It adheres well to surfaces and can withstand heavy loads and high pressures. You'll typically use grease on pivot points, bearings, and other areas with slow - moving parts.
- Oil: Oil is a thinner lubricant that provides good coverage and can quickly penetrate into small spaces. It's ideal for areas with high - speed moving parts, such as chains and gears.
When selecting a lubricant, make sure to check your lift's manual. The manufacturer usually recommends a specific type of lubricant based on the design and materials of the lift.
Tools You'll Need
Before you start lubricating your vehicle storage lift, gather the following tools:
- Lubricant: As mentioned above, choose the appropriate grease or oil.
- Grease gun: If you're using grease, a grease gun is essential for applying it precisely to the right spots.
- Oil can or spray bottle: For oil lubricants, an oil can or a spray bottle will make application easier.
- Clean rags: You'll need clean rags to wipe off any excess lubricant and to clean the areas before applying the lubricant.
- Safety equipment: Don't forget to wear safety glasses and gloves to protect yourself from any potential splashes or spills.
Step - by - Step Lubrication Process
Step 1: Prepare the Lift
- First, make sure the lift is in a safe and stable position. Lower it all the way down and turn off the power to prevent any accidental movement.
- Inspect the lift for any signs of damage, such as cracks, loose bolts, or worn - out parts. If you notice any issues, address them before proceeding with lubrication.
Step 2: Clean the Areas to be Lubricated
- Use a clean rag to wipe away any dirt, dust, or debris from the areas where you'll be applying the lubricant. This ensures that the lubricant can work effectively and won't be contaminated by foreign particles.
Step 3: Lubricate the Pivot Points
- Pivot points are areas where parts rotate or pivot. These are usually found at the joints of the lift's arms and legs.
- If you're using grease, load the grease gun with the appropriate grease. Attach the grease gun to the grease fitting at the pivot point. Pump the grease gun until you see a small amount of fresh grease coming out. This indicates that the old grease has been pushed out and the new grease has filled the space.
- Wipe off any excess grease with a clean rag.
Step 4: Lubricate the Bearings
- Bearings support the weight and allow parts to rotate smoothly. They can be found on the axles and other moving components of the lift.
- Apply grease to the bearings in the same way as you did for the pivot points. Make sure to fill the bearing completely with grease to ensure proper lubrication.
Step 5: Lubricate the Chains and Gears
- Chains and gears are high - speed moving parts that require regular lubrication.
- If you're using oil, pour it into an oil can or spray it directly onto the chains and gears. Make sure to cover the entire surface of the chain links and gear teeth.
- Run the lift up and down a few times to distribute the oil evenly.
Step 6: Check for Excess Lubricant
- After lubricating all the necessary parts, check for any excess lubricant. Wipe it off with a clean rag to prevent it from attracting dirt and debris.
Frequency of Lubrication
How often you should lubricate your vehicle storage lift depends on several factors, such as how often you use the lift, the operating conditions, and the type of lubricant used. As a general rule of thumb, it's a good idea to lubricate your lift every 3 - 6 months for normal use. If you use the lift more frequently or in harsh conditions, you may need to lubricate it more often.
Our Vehicle Storage Lift Products
At our company, we offer a range of high - quality vehicle storage lifts. Check out our DAXLIFTER 2.3T Car Garage Scissor Parking Lift, which is perfect for home garages. It's easy to operate and provides reliable lifting performance.
If you're looking for a more versatile option, our DAXLIFTER Home 4 Post Auto Car Hoist Stacker Parking Lift with Custom Service is a great choice. It offers customizability to meet your specific needs.
And for those who need to store multiple cars, our DAXLIFTER 2.3t - 3.2t 2.1m Home 2 Double Car Vehicle Storage Stacker Parking Lift is the ideal solution. It can safely stack two cars, saving you valuable garage space.
Conclusion
Lubricating your vehicle storage lift is a simple yet essential maintenance task that can significantly extend the life and performance of your lift. By following the steps outlined in this blog, you can keep your lift running smoothly and avoid costly breakdowns.
If you're interested in purchasing a new vehicle storage lift or have any questions about maintenance, don't hesitate to reach out. We're here to help you make the best choice for your needs and ensure that your lift serves you well for years to come.
References
- Vehicle storage lift user manuals
- Industry standards for lift maintenance and lubrication


