






Hey there! As a supplier of car lift platforms, I'm stoked to walk you through the installation process of a four - post car lift platform. Whether you're a professional mechanic or a car enthusiast looking to set up a home garage, this guide will help you understand what's involved.
Pre - installation Preparation
Before you even start unpacking the lift, there are a few things you need to take care of. First off, you've got to pick the right location. The area where you plan to install the lift should be flat and level. A slope or uneven surface can cause all sorts of problems down the line, like the lift not operating smoothly or even becoming unstable. You can use a spirit level to check the floor. If it's not level, you might need to make some adjustments, like using shims.
Next, you need to check the floor's load - bearing capacity. Four - post car lifts are heavy, and they'll be supporting even more weight when a car is on them. You can consult a structural engineer if you're not sure about your floor's strength. Usually, a concrete floor with a thickness of at least 4 inches and a compressive strength of around 3000 psi is a good bet.
You'll also want to clear the area of any debris, tools, or other items. This will give you plenty of space to work and reduce the risk of tripping or damaging the lift components. And don't forget to gather all the necessary tools. You'll typically need a socket set, wrenches, a torque wrench, and a drill.
Unpacking and Inspection
Once you've got the installation area ready, it's time to unpack the lift. Carefully open the boxes and lay out all the components. Check each part for any signs of damage during shipping. Look for dents, scratches, or missing pieces. If you find anything wrong, contact the manufacturer right away.
Most four - post car lift platforms come with a detailed instruction manual. It's super important to read this manual from cover to cover before you start assembling the lift. The manual will have all the information you need about the parts, the assembly sequence, and the safety precautions.
Assembly of the Four - Post Car Lift
Let's start with the posts. The posts are the vertical structures that support the entire lift. Usually, they come in sections that need to be bolted together. Use the provided bolts and nuts and make sure to tighten them to the recommended torque using a torque wrench. This is crucial for the stability of the lift.
After assembling the posts, it's time to install the cross - beams. These beams connect the posts and provide additional support. Place the cross - beams in the designated slots on the posts and secure them with bolts. Again, follow the torque specifications in the manual.
Once the basic frame is assembled, you'll need to install the runways. The runways are where the car will rest. They are attached to the cross - beams and should be level and parallel to each other. You can use a level to ensure proper alignment.
Hydraulic System Installation
The hydraulic system is what makes the lift go up and down. First, you need to install the hydraulic cylinder. This is usually located in one of the posts. Connect the hydraulic hoses to the cylinder and the hydraulic power unit. Make sure the connections are tight to prevent any leaks.
Fill the hydraulic reservoir with the recommended hydraulic fluid. Check the fluid level regularly during the installation process. The hydraulic power unit should be placed in a well - ventilated area and connected to a power source. Make sure to follow the electrical wiring instructions in the manual to avoid any electrical hazards.


Testing and Calibration
After the lift is fully assembled, it's time to test it. Start by raising the lift a few inches off the ground. Check for any unusual noises, vibrations, or leaks. If everything seems okay, continue to raise the lift to its maximum height.
Once the lift is at its highest point, check the levelness of the runways again. You might need to make some minor adjustments to ensure that the car will be stable when parked on the lift.
Calibration is also an important step. You need to set the lift's safety features, such as the locking mechanisms and the limit switches. These features are designed to prevent accidents and ensure the safe operation of the lift.
Safety Considerations
Safety should always be your top priority when installing and using a four - post car lift platform. Make sure to follow all the safety instructions in the manual. Wear appropriate safety gear, such as safety glasses and gloves, during the installation process.
Keep the area around the lift clear of any obstacles. Make sure there are no loose tools or debris that could fall and cause an accident. And always use the lift's safety features, like the locking pins, when the lift is in use.
Other Types of Car Lift Platforms
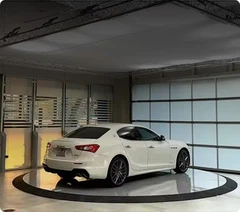
If you're interested in other types of car lift platforms, we also offer Floor To Floor Car Lift Platform and DAXLIFTER Customized Car Vehicle Rotary Rotating Stage Platform. These lifts have their own unique features and installation processes, but the basic principles of safety and proper installation still apply.
Contact Us for Purchase and Consultation
If you're thinking about buying a car lift platform, whether it's a four - post lift or one of our other products, we're here to help. We've got a team of experts who can answer all your questions and guide you through the purchasing process. We can also provide installation services if you need them. So, don't hesitate to reach out to us for more information and to start your car lift project.
References
- Manufacturer's instruction manuals for four - post car lift platforms
- Industry standards for car lift installation and safety


